Pages

Friday, August 31, 2012

I Am A Repeat Impressions Rock Star!!!

Good morning everyone we've all made it to Friday!!!  I have some special news to share with everyone; I am the newest Rock Star for Repeat Impressions!  I am so super excited about this.  Please go over and check out their stamps they are amazing!  Such a huge variety of high quality stamps with categories ranging from wildlife/birds/dogs/cats/lighthouses/love/birthdays/all holidays/to many to really mention all the different ones.  They even have "flip stamp sets", "swing stamp sets" & custom made stamps.  
There are weekly challenges here also, so get ready for those!  You can click on the "What If Wednesday" icon in my sidebar  to always find the current challenges and the prizes offered.
I will be working with a group of amazingly talented women and I couldn't be more thrilled to be a part of this.

Thank you for stopping by and sharing in my good news today.  I hope you find time today to do something creative!  Take care.
Photobucket

Thursday, August 30, 2012

Dazzles - Perfect Pearls - Embossing OH MY!

Good morning everyone...well, we are at Thursday which means only one more day until a three day weekend.  Do you have anything special planned?  Any last minute grill-outs?  Do you know that I have not been to one grill out this entire Summer!  What is up with that?  I am going to a grill out next Thursday.  I really am looking forward to that because it is a new group that I am joining in on.  Everyone else there will know each other and I am the newbie so to speak.  This is a small group that I was "matched up" with through my church.  I have never belonged to a group like this and so I am a wee bit nervous but at the same time I am very excited.  They meet over here on the East-side of Cincinnati by me which is nice being close and twice a month we will all get together.  We were asked that if we wanted to bring something as a side dish for next week to go for it...I cannot cook at all.  I want to bring something but something that won't poison them all...any suggestions?  I'll have to think on this one.  I was told that since it is my first time meeting everyone in the group that I do not need to bring anything but I really want to.

Today is a really busy day for me though, I have to go to the Middletown Arts Center to drop off some sample kits for some upcoming workshops.  One at the MAC and the other at Mt. Pleasant Retirement Village.  I have two other appointments today that between the 3 I will deplete all gas that I just put into the tank yesterday...ughhh.

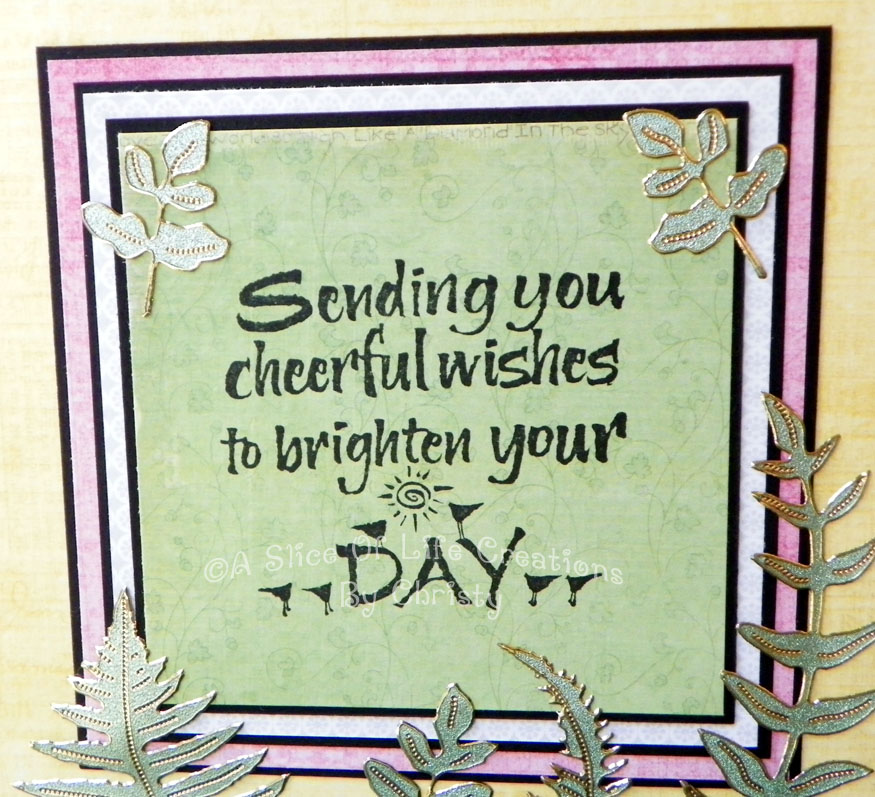
Cheerful Fern Wishes
Here is a card that I worked on last night


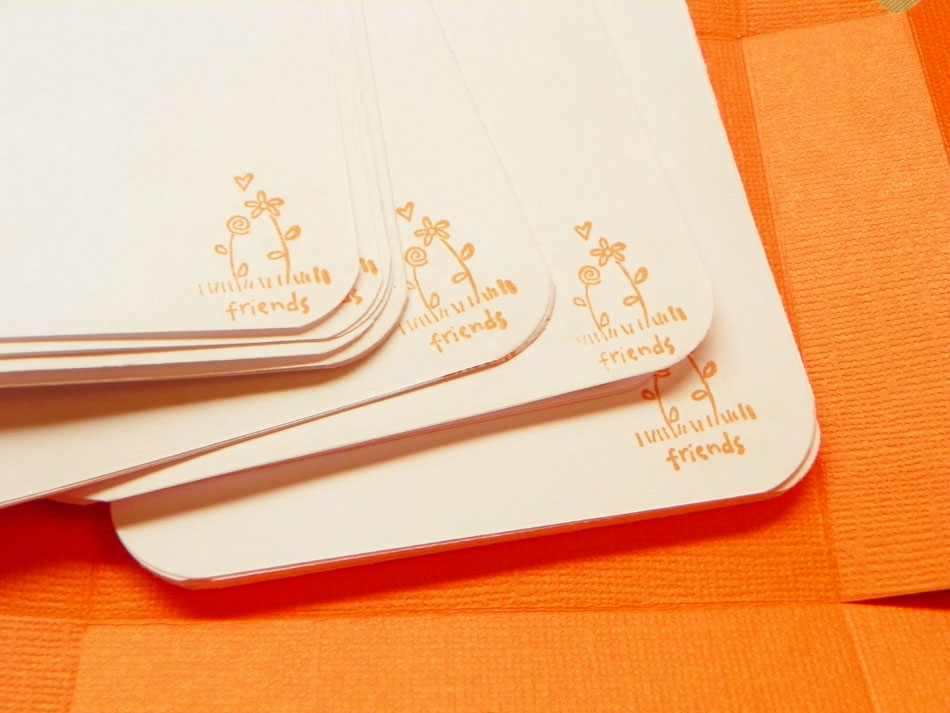
This is the inside of the card


I am not entering this card into any challenges, I just wanted to make a card using these fern Dazzles that I had in my stash.  Unfortunately since I created it at night, I also photoed it at night and you cannot really get a good look at how shimmery and gorgeous these ferns are in real life.  They are made out of a  sparkly/glimmering material and are radiant.  The stems on the insides are all gold.
Materials Used:
White card stock as card base of 5" x 6"
Black card stock 
Paper from the Teresa Collins paper pack "Sweet Afternoon"
Paper from Fancy Pants paper pack "Baby Mine"
Stamp from Inkadinkado
Ink StazOn Jet Black
Fern Dazzles
Scotch ATG adhesive 

I also created another quickie Christmas card

B&W Christmas Card With Green/Red Accents
The sketch which was the inspiration of yesterdays Christmas card that I made was also the design inspiration behind this one

The color in this second picture is truer to the correct color.  I was a bit impatient and took this picture also in the night.  The gold accent around the green & black card stock was Eric's idea.  He and I looked at it knowing it needed something and we both tossed out some ideas and I liked his best.  Even though he didn't come right out and say "Hey Christy, I think some gold Perfect Pearls would do the trick..." he said enough to make me go to the pearls, lol.  I thought it just really brought it all together.  
Materials Used
White card stock as card base which is 5" x 7"
Black card stock 
More white card stock ran through my Sizzix Texture Boutique using a Cuttlebug embossing folder
Spellbinders Nestabilities - Labels Eighteen (S4-310)
Recollections Cling Stamp
Memento Cottage Ivy Ink
Perfect Pearls Sunflower Sparkle 
Cuttlebug Embossing Folder
Sizzix Texture Boutique 
Red Ribbon 
Scotch - ATG adhesive

I hope you like these cards & are inspired to create something today! Thank you as always for taking the time to stop by, take care & have a wonderful day!
Photobucket

Wednesday, August 29, 2012

Christmas Card Challenge & Copics

Good afternoon everyone & Happy Humpday!
So I went to the doctor yesterday and got some antibiotics for this cold/allergy/flu-like thing I have.  I am trying to get better and keep busy but it's getting harder when not feeling my best.

New Challenge Christmas Card
I made a Christmas card that will fit into a few different challenges. First is one over at Christmas Card Challenges and uses their sketch for weekly challenge #39, the next site is for Jingle Belles Rock and they are having a B-I-N-G-O type challenge over there.  For my BINGO if you go to their site I used BLING, STICKERS & RIBBON.  Last but not least is Creative Card Crew and they ask that you have a Christmas card.
Here is my card

To create this card I used some paper by K&Co. that I have had for over a year, some Echo Park paper, lace, some bling, Merry Christmas metal sticker, Recollections Christmas tree stamp, Cougar Opaque paper for stamping, Copic Markers
Star - Y06 & Y08
Tree - YG17 & YG13
Ornaments - RV19, RV14, RV06, R37, R85, V15 & B24
Trunk - E35 & E31
and lastly I used Silver Stickles.

Hope you like it and are inspired to create something today!
Thank you for stopping by, take care and have a great day!

Photobucket

Monday, August 27, 2012

Acrylic Blocks & Adirondack Blending Solution...Did You Know?

Good morning everyone!  Yeah yeah I know it's Monday, but think of it as a new beginning or a fresh week to start something new & creative.

So last night I was messing around with some of my acrylic blocks that I use for stamping and thinking how bad they look because they are all stained from every type of ink & a ton of other mediums that I have used with them.  Now maybe you all know this trick but I didn't have a clue about it.  In fact it was just a happy coincidence that I discovered this.  If you take your stained & marked up acrylic stamper blocks and put some Adirondack Alcohol Blending Solution on them they will wipe clean!
  Who knew?!  Not me!

Before They Were Cleaned
I didn't photo every single one of my blocks because I honestly have a ton like I am sure a lot of you do.  I just took a few photos but they all came clean; even the Fiskars stamping block with the foam pads on it


Here are the after pictures


Now like I said, you all may have known about this and I may be showing my ignorance here in this post for not already knowing.  I am posting this because there may be some of you who did not know this and I know that I would have liked to known if I didn't already.  So I hope that I was able to enlighten at least some of you with this tid-bit of information.

Thank you for stopping by, take care & have a great day!!!
Photobucket

Wednesday, August 22, 2012

New Card For Challenges - Too Cute To...

Hi everyone!  It's late but I wanted to show you the card I made for a few challenges.  The first challenge is from Paper Playtime and the challenge is to create a card that has a sentiment one it as well as polka-dots.  The second challenge is over at CardzTV and that challenge is to create a card with a "critter" on it and the rest is up to you.  The third challenge is on Crazy Challenge #127 Anything Goes; that is exactly what that challenge is.  So without further ado, here is my card:


I created this Center Step Card with Echo Park Paper Summer Days collection, stamp sentiment is from Stampabilities "Too Cute To...", the critter is from Mini Monsters Cricut Cartridge, and I love the look of the card itself, this center step format is really a neat touch. 

Thank you for stopping by to see my card, take care!
Photobucket

Tuesday, August 21, 2012

Completed Altered Halloween Jars, Note Card Boxes & Lake Waynoka Craft Fair!

Good evening everyone, hope your day has been a crafty one!  I have been feeling a little under the weather here the past couple of days.  However this is not a huge surprise to me considering that my son Kevin was sick, then Eric got sick and I guess it's only fair for me to get it too, lol.  Hopefully I won't get it so bad as the guys did.  They both missed several days of work due to this ickyness - word of the day.

I have been busy though sick or not getting some things completed that I started on like my Altered Halloween Jars that I posted about.  

Altered Halloween Jars
Here are the photos of them completed:


These all have one coat of gesso, two coats of black acrylic paint, two coats of polycrylic sealer, vinyl cut outs from the A Frightful Affair & Happy Haunting's Cricut cartridges, purple metallic acrylic paint on the lids.
Inside there will be treats of the crafty nature like some brads or other small embellies...I haven't gotten that far as to what to put inside.  But all and all these are finished and I am so pleased with how they turned out.  Remember this is what they all looked like in the beginning...
So yea...I am happy with the results.

Note Card Boxes
I found this tutorial on Split Coast Stampers and they are really easy to create.
Here is a closer look at them before they were actually made, the paper for the insides is just copier paper cut to 3 1/2 x 3 1/2, rounded the corners & stamped on ends


Lake Waynoka
I got my invite to participate in the 2012 Shawnee Squaws Craft Fair which is on October 13th  from 9am to 4pm.
So I have been getting things ready for this as well. Busy Busy Busy!!!  But that is how I like it!

Hope you all take care and thank you again for stopping by and visiting!
Photobucket

Saturday, August 18, 2012

Two New Cards Today!

Good morning fellow crafters!  Oh I am tired and it's just a few minutes before 5AM on Saturday...I have to take my son to work this morning.  Yeah! I suppose there are worse reasons to be up at 5AM.  I am trying to get my crafty mojo warmed up but it's not happening for me at the moment.  Perhaps later on I will have the spark hit me.  For now I want to share with you two cards; one I created for Let's Make Greeting Cards Design Team and the other is one that I created just because.

Let's Make Greeting Cards
The card measures 5"x 5" and I used Scenic Route paper and the Birthday Stitched Dazzels.  Here is a close up look at the before picture of the Dazzels without the holes poked in yet - you can see where the holes need to be poked through to the paper 
After you poke through the holes you begin to stitch out the pattern
This is your final result 
This part of the card is popped up on some foam adhesives
There are so many different cards to see on the Let's Make Greeting Cards site, please check it out here if you get a chance.

"Moments" Card
I created this card using a stamp that I love but rarely use.  I felt that after I stamped it on here that I didn't want to color it in, I think it "speaks" more to be in its original state and not colored in.

As you can see it is a pretty simple card and I like that about it.  I hope you do to.

Thank you all for stopping by today I truly hope you have a wonderful Saturday!  Take care!
Photobucket

Thursday, August 16, 2012

New Card Using Spotlighting Technique & Altered Binder Cover

Hello hello hello!!!  It's Thursday evening and my weekend is officially underway.  I have completed a new card using the spotlight technique and this is my first attempt at this type of card. I am pleased that it turned out nicely.

Challenge Card


This card is being entered into a couple different challenges; the first is the original sketch from The House That Stamps Built this is what inspired me to create this type of card. It is Repeat Impressions Sketch A812 The other challenge I am doing is from the Make It Monday blog, 

I used Copic Markers V17, V15, V12, RV14, RV17, RV19, YG17, YG13, YG11, YR65 and Y38
The colored image was stamped with Memento Tuxedo Black ink on Cougar Opaque - White paper

Altered Binder Cover
I joined a new group and they handed me out a binder which contains all the necessary paperwork I will be needing over the next several months.  The binder was red, plain and just downright boring.
See what I mean?
The reason there is all that scrap patterned paper in this picture is because originally I was going to create a collage with all that to cover the front, but I decided on something else.
I took a piece of heavy card stock and stamped repeatedly with a swirly background stamp, I also used (to many to list) my Copics again on coloring in another stamped image.  
I cut up the colored images into lines of three and adhered them to the stamped card stock

Here is the front:

Here is the back, side and whole thing together opened up


I just wanted to spruce it up a bit and I think I am happy with how this turned out also!  So all in all it's been a good crafty day for me!

Thanks for stopping by, take care & see you soon!
Photobucket