Happy Sunday everyone! I know I know the weekend is just about over and that makes me sad. But I cannot really complain because I have had a pretty good one. The weather was perfect Saturday! I mean it didn't even get into the 80's which I think is a huge deal considering the heat we've all been dealing with lately.
I have two cards to share with you today. I made them actually the other day; well last week to be correct. I just haven't had a chance to post them. So many other things have been popping up. But I digress...
Christmas Cards
The first card I created has a 3D ornament on the front. It looks almost like a big peppermint sitting here all pretty.
The paper is Recollections paper that I had from last Christmas season - The Bright Collection. The green paper is embossed with my Sizzix Texture Boutique using a Cuttlebug folder since they are compatible with each other. I cut out the triangle to give it this flag look.
The other card uses some white holographic paper which I think is very nice for a Christmas card because it looks like a beautiful Winter scene.
The holographic paper is also embossed on the Texture Boutique with a different Cuttlebug embossing folder (sorry I do not know the actual names of the ones I have). But this white paper really adds to the effectiveness of the whole scene we are looking at. The bling is also Recollections. This card is very easy to create. Simply cut out some triangles for your trees in different festive colors and use some decorative scissors to trim bottoms and viola! you have a gorgeous card.
Craft Book
A long time ago I mentioned to you about creating a book to have for reference of all my supplies on hand. Well I did that in a bit different way than I had originally planned on. What I wanted was a book that has all my personal sketches of cards and layouts AND supplies AND color scheme inspiration...do you know how big of a binder/book I would have to create to fit all that in!? A pretty big one I'll tell you that. So I did the next best thing, I had a hardbound 8" x 10 1/2" lined journal that I added some tiny tabs to and went from there. Now I am not showing you a photo for EVERY section because that would be overdoing it I think on the photos. I am showing you a few so you get the general idea.
I will tell you the sections that I do have included for your reference:
1. Cricut
2. Spellbinders
3. Copics
4. Stickles
5. Pearls & Viva's
6. Paints
7. Perfect Pearls
8. Inks
9. Embossing Powder
10. Glitter
11. Flock
12. Alcohol Inks
13. Mists
14. Paper Pads/Packs
15. Dazzles
16. Sizzix
17. Stencils
This is the edge of the book showing the tabs
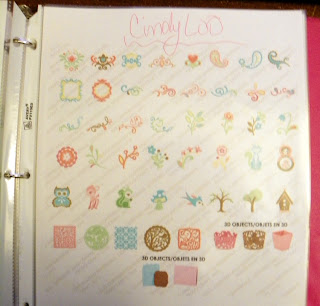
Cricut cartridges on a few pages
Copic Marker Inventory
If anyone is interested in the sheets here for your Copic Marker inventory please leave me a comment or contact me and I will send you the file.
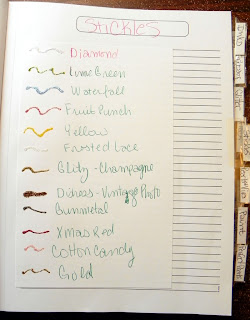
A couple pages for Stickles. As you can see I put all the Stickles on a separate piece of paper before pasting into my book, this way I could continue working in it without having to wait for them to dry.
Stencils I uses some inks to dab in them to make my references here
This is a nice thing to have handy if you are looking for a specific color or image or need to know what you do and don't have in the way of supplies.
My Cricut Cartridges Organization System
I know that I have all my cartridges listed in the Craft Book but I wanted a separate and more in detailed book of my Cricut cartridges since I use them often.
I used a regular pink 3 ring binder with protective sleeves for every page so ripping would not be an issue.
First I have a couple pages that list what cartridges I have both physically as well as what was pre-loaded on my E2 machine and my Gypsy
If you are interested in this spreadsheet here is the link to where I got it from.
What I did here with the rest of the binder was I went to Cricut.com to their cartridge library, found the cartridges I own and clicked on the sample sheet. Then printed those out & placed them in the protective sleeves.
I also added some Cricut Tips for my quick reference
The way I store my actual cartridges, booklets and overlays is in one drawer and it works great! The cartridges are actually inside what originally was my Copic marker case. The overlays are sandwiched into each booklet and then placed in alphabetical order on the left side of the cartridges.
This is a drawer unit I bought from Michaels and I believe it is a Recollections brand, but I am not 100% certain. I know that it definitely came from Michaels though.
This was a long post but I wanted to share my way with you on how I organize my supplies and Cricut stash. Hope you were able to get some ideas that you can maybe use yourself!
Take care and thank you again for stopping by. Hope you have an excellent day!


2 comments:
wowww how many cartridges do you have???
Thank you for sharing...I really needed a reference for my supplies...Have a great day....
Post a Comment
All of your comments mean so much to me! Thank you for taking the time to do so.
Smiles!
Christy